
Championship Invitational with Teflon®
The Championship Invitational is a 20oz worsted blend cloth bathed in DuPont Teflon® for maximum stain resistance and durability.
• Composition: 75% wool / 25% nylon
• Weight: 20oz
• Protection: DuPont Teflon® coating
• Includes: Pre-cut rail pieces, bed piece, and rack spot
• Colors: Wide variety of standard and tournament colors
This is our most popular option for home game rooms — offering the perfect balance of playability, durability, and stain resistance.
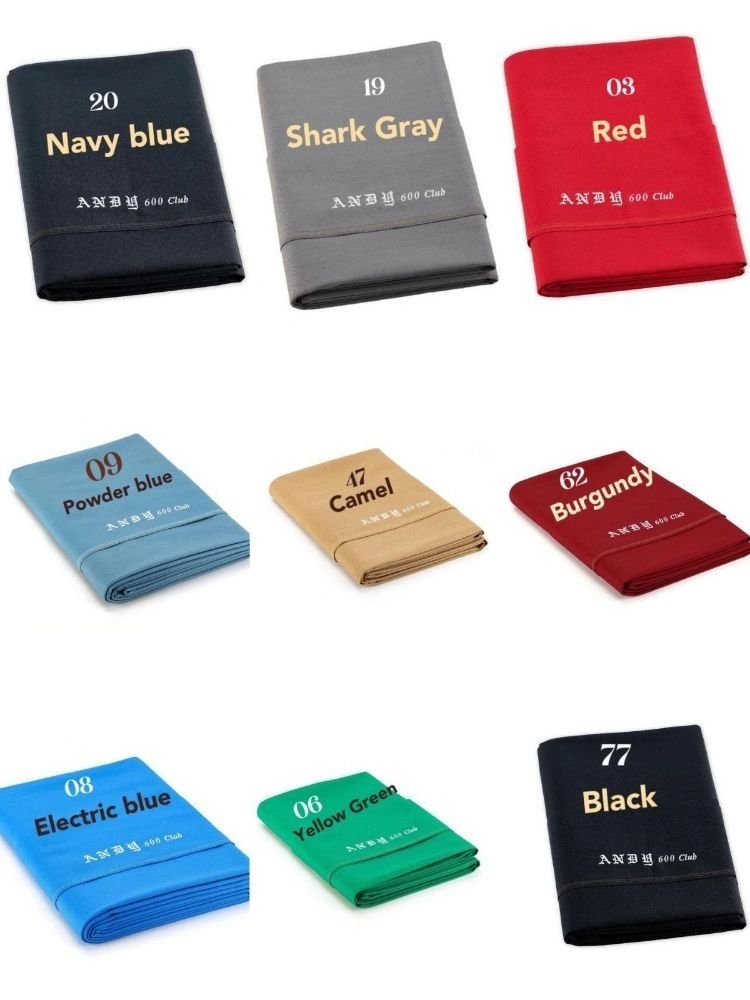
Andy 600 Worsted Cloth
The Andy 600 is a premium worsted cloth made from Australian wool and nylon blend, delivering tournament-level speed and consistency.
• Composition: 70% wool / 30% nylon
• Material: Australian merino wool
• Colors: 9 available colors
• Performance: Fast speed with strong durability
• Best for: Serious players and pool halls
This cloth provides a faster, more consistent playing surface preferred by competitive players and tournament venues.
Andy Cloth Sample
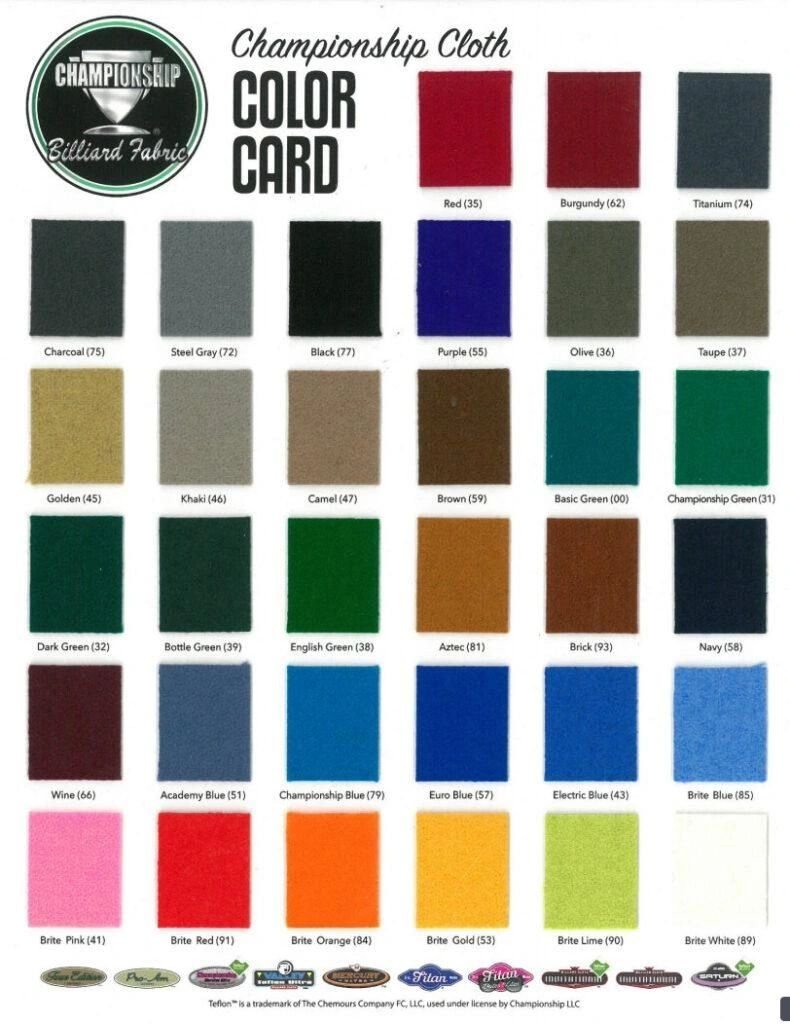
Championship Cloth Color Chart
Get Your Table Re-Felted Today
Re-felting starting at $595 — includes cloth and professional installation